Building a preformed pond
Preformed ponds offer a quick and effortless way to introduce water into the garden. The shape is already designed to offer an attractive and practical home for pond fish and marginal planting baskets.
1. Marking out and digging
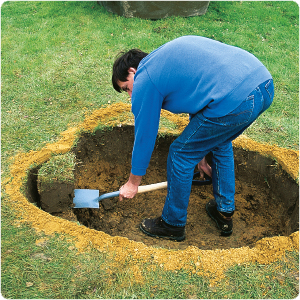
Place the preformed pond on the ground where it will be installed. Mark around the shape of the pond with sand and remove the pond.
Dig out the shape of the pond, using the sand line as a marker.
Allow an extra 5cm depth for a layer of sand to be added.
Measure the depth of the shelf, then dig to this level.
2. Remove debris
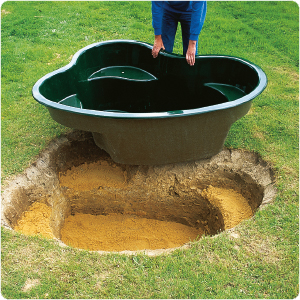
Once the shape and shelves have been dug out, remove any stones that may pierce the pond.
Place the pond in the hole, ensuring it is at the correct level relative to the surrounding area.
If necessary, dig out any excess areas. Line the base of the pond and the shelves with sand and
place the pond back into the hole.
3. Check the pond is level
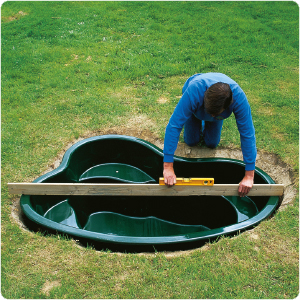
Using a spirit level, ensure the pond is level. Once level, use the spoil from the hole to back fill the pond. Ensure the soil is compacted down, to prevent the pond from shifting as it is filled with water.
Once filled, leave the pond for at least one week before adding edging stones, waterfalls and plants etc.
This will ensure that any ground movement does not result in having to re-install pond décor.
4. Finishing touches
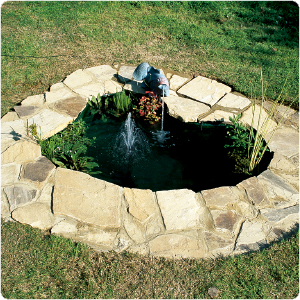
Before adding edging materials, ensure you allow space for electrical connections.
When installing electrical items around the pond, use a switchbox designed for water garden use. Once the pond has been filled with water, it can be treated with a dechlorinator to remove harmful chemicals.
Plants can be added and should be left for a period of 2 weeks to establish before the first few fish are introduced.